Articles
How PressLoom turns a keyword into a finished article, and what you can do with it once it exists.
Every article starts as a keyword on your content planner. You pick one, PressLoom writes the article, then you read it, fix what needs fixing, and send it to your website.
Generating an article
Go to the Content Planner and find the keyword you want. Each keyword sits on a card on the calendar. Click the card and you get two buttons.
- Pre-Create writes the article and leaves it as a draft for you to review. This is the one to use while you are still getting a feel for the output.
- Create & Publish writes the article and starts the handoff to your website.

Generation takes about two minutes. Leave the tab open while it works. The card shows a spinner, and the article appears in Content History with a Generating status until it is finished.
PressLoom can also work through your calendar on its own, generating and publishing without you clicking anything. That runs once background processing is enabled for your account. Until then, every article is started by hand from the planner, which works exactly as described above.
Generating by hand is capped at ten articles an hour per account, which is more than anyone works through in a sitting. If you ever see a message about a monthly limit, email Titanium and we will lift it.
What PressLoom writes
You get a long article, not a blog snippet. Most land between 3,000 and 5,000 words. If you set a length on the keyword before generating, PressLoom aims for that number instead.
Every article is built to the same shape:
- A title and an opening section, then four to eight main headings with subheadings under them.
- Callout boxes through the body, labelled things like Key Takeaway and Practical Example.
- One to three comparison tables, and bullet lists with bold labels.
- A questions section near the end, with three to five questions phrased the way a customer would ask them.
- A closing call to action naming your business, if you have that turned on in Settings.
- A relevant YouTube embed, if you have that turned on.
- A meta title of about 60 characters, a meta description of about 160, and a URL slug, all generated for you.
Your business description, target audiences and competitors all feed the writing, which is why filling those in properly pays off. Anything you typed into Global Article Instructions in Settings, or into the instructions box on the keyword itself, is passed to the writer too.
Internal links to your other pages get woven in once PressLoom has a map of your site's pages. Building that map runs once background processing is enabled for your account, so early articles will not have them.
Content History
Content History is the list of every article PressLoom has generated for the site you are currently on. Open it from Content History in the sidebar.
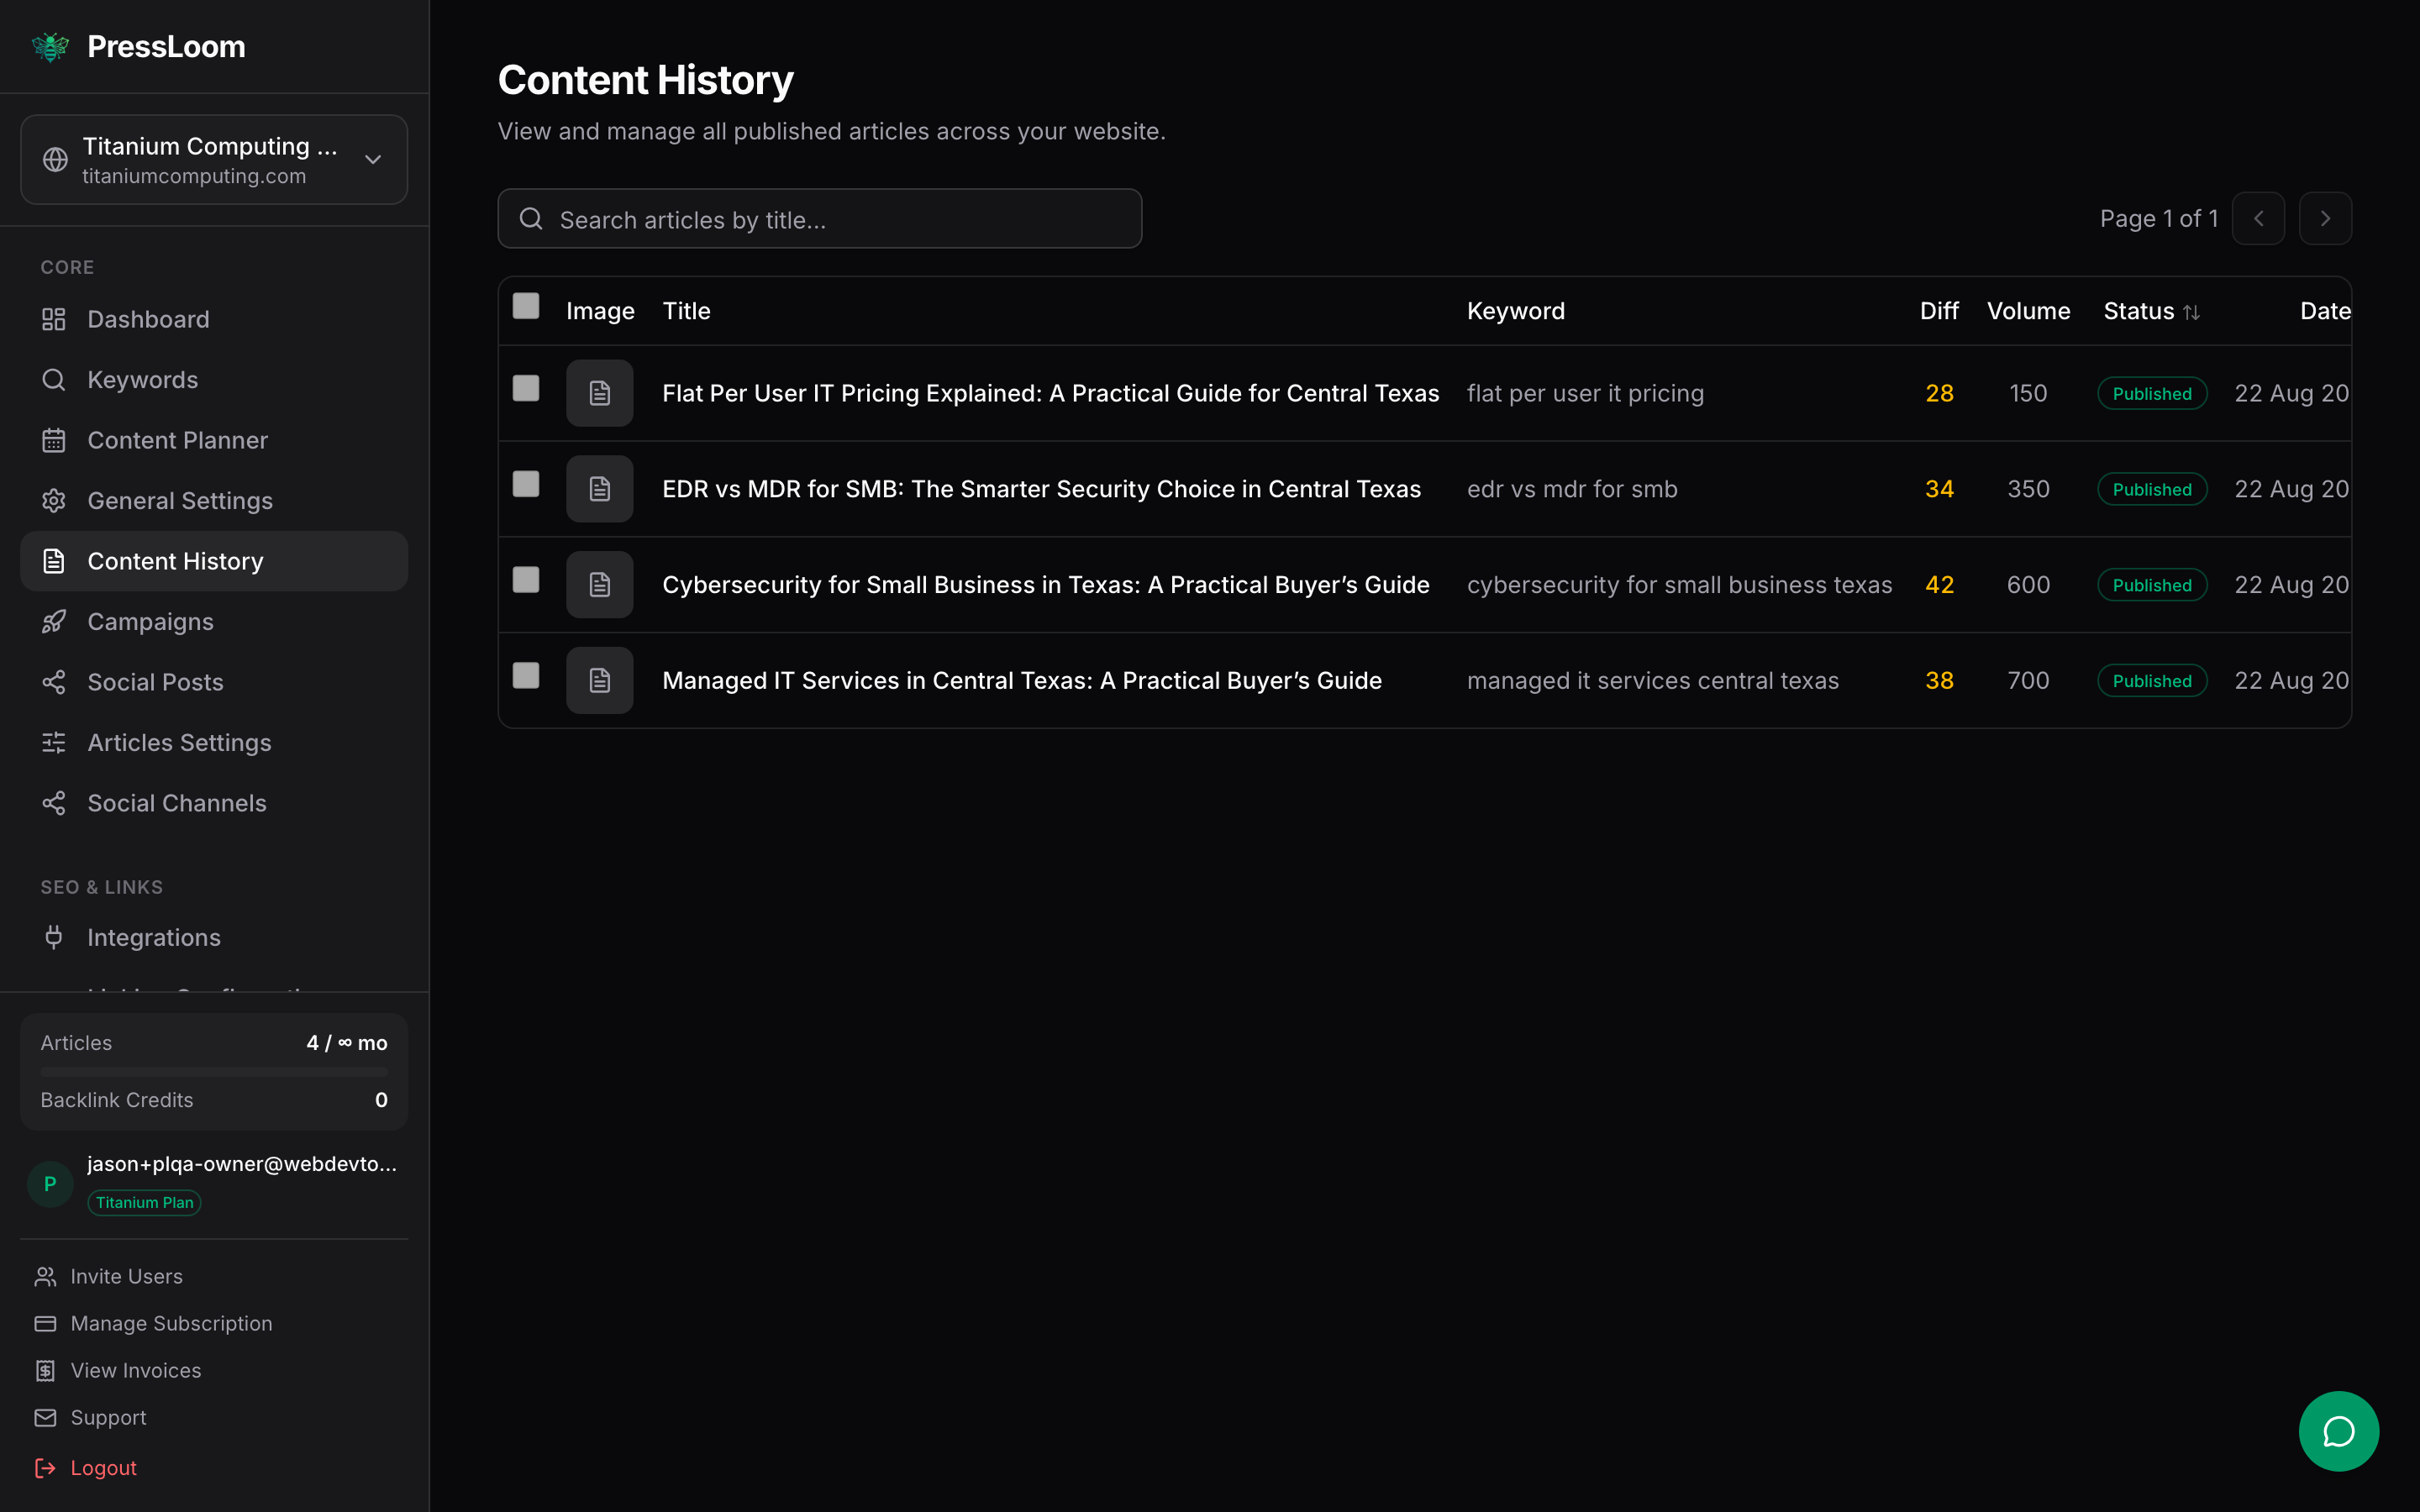
The search box filters by title. Ten articles show per page, and the arrows at the top right move between pages. The Diff and Volume columns are the difficulty and monthly search volume of the keyword the article was written for.
What the statuses mean
| Status | What it means |
|---|---|
| Generating | PressLoom is writing it right now. Give it a couple of minutes. |
| Draft | Written and saved in PressLoom, not sent to your website yet. This is where an article sits after Pre-Create. |
| Published | PressLoom has handed the article to your connected site. |
| Failed | Something went wrong partway through writing. Nothing was sent anywhere. Go back to the keyword card on the planner and click Retry. |
Draft and Published are the two you set by hand. Everything else PressLoom sets for you.
The article page
Click a title in Content History to open the article. The article itself fills the left side, rendered the way it will read on your site. Everything you can do to it lives in the cards down the right.
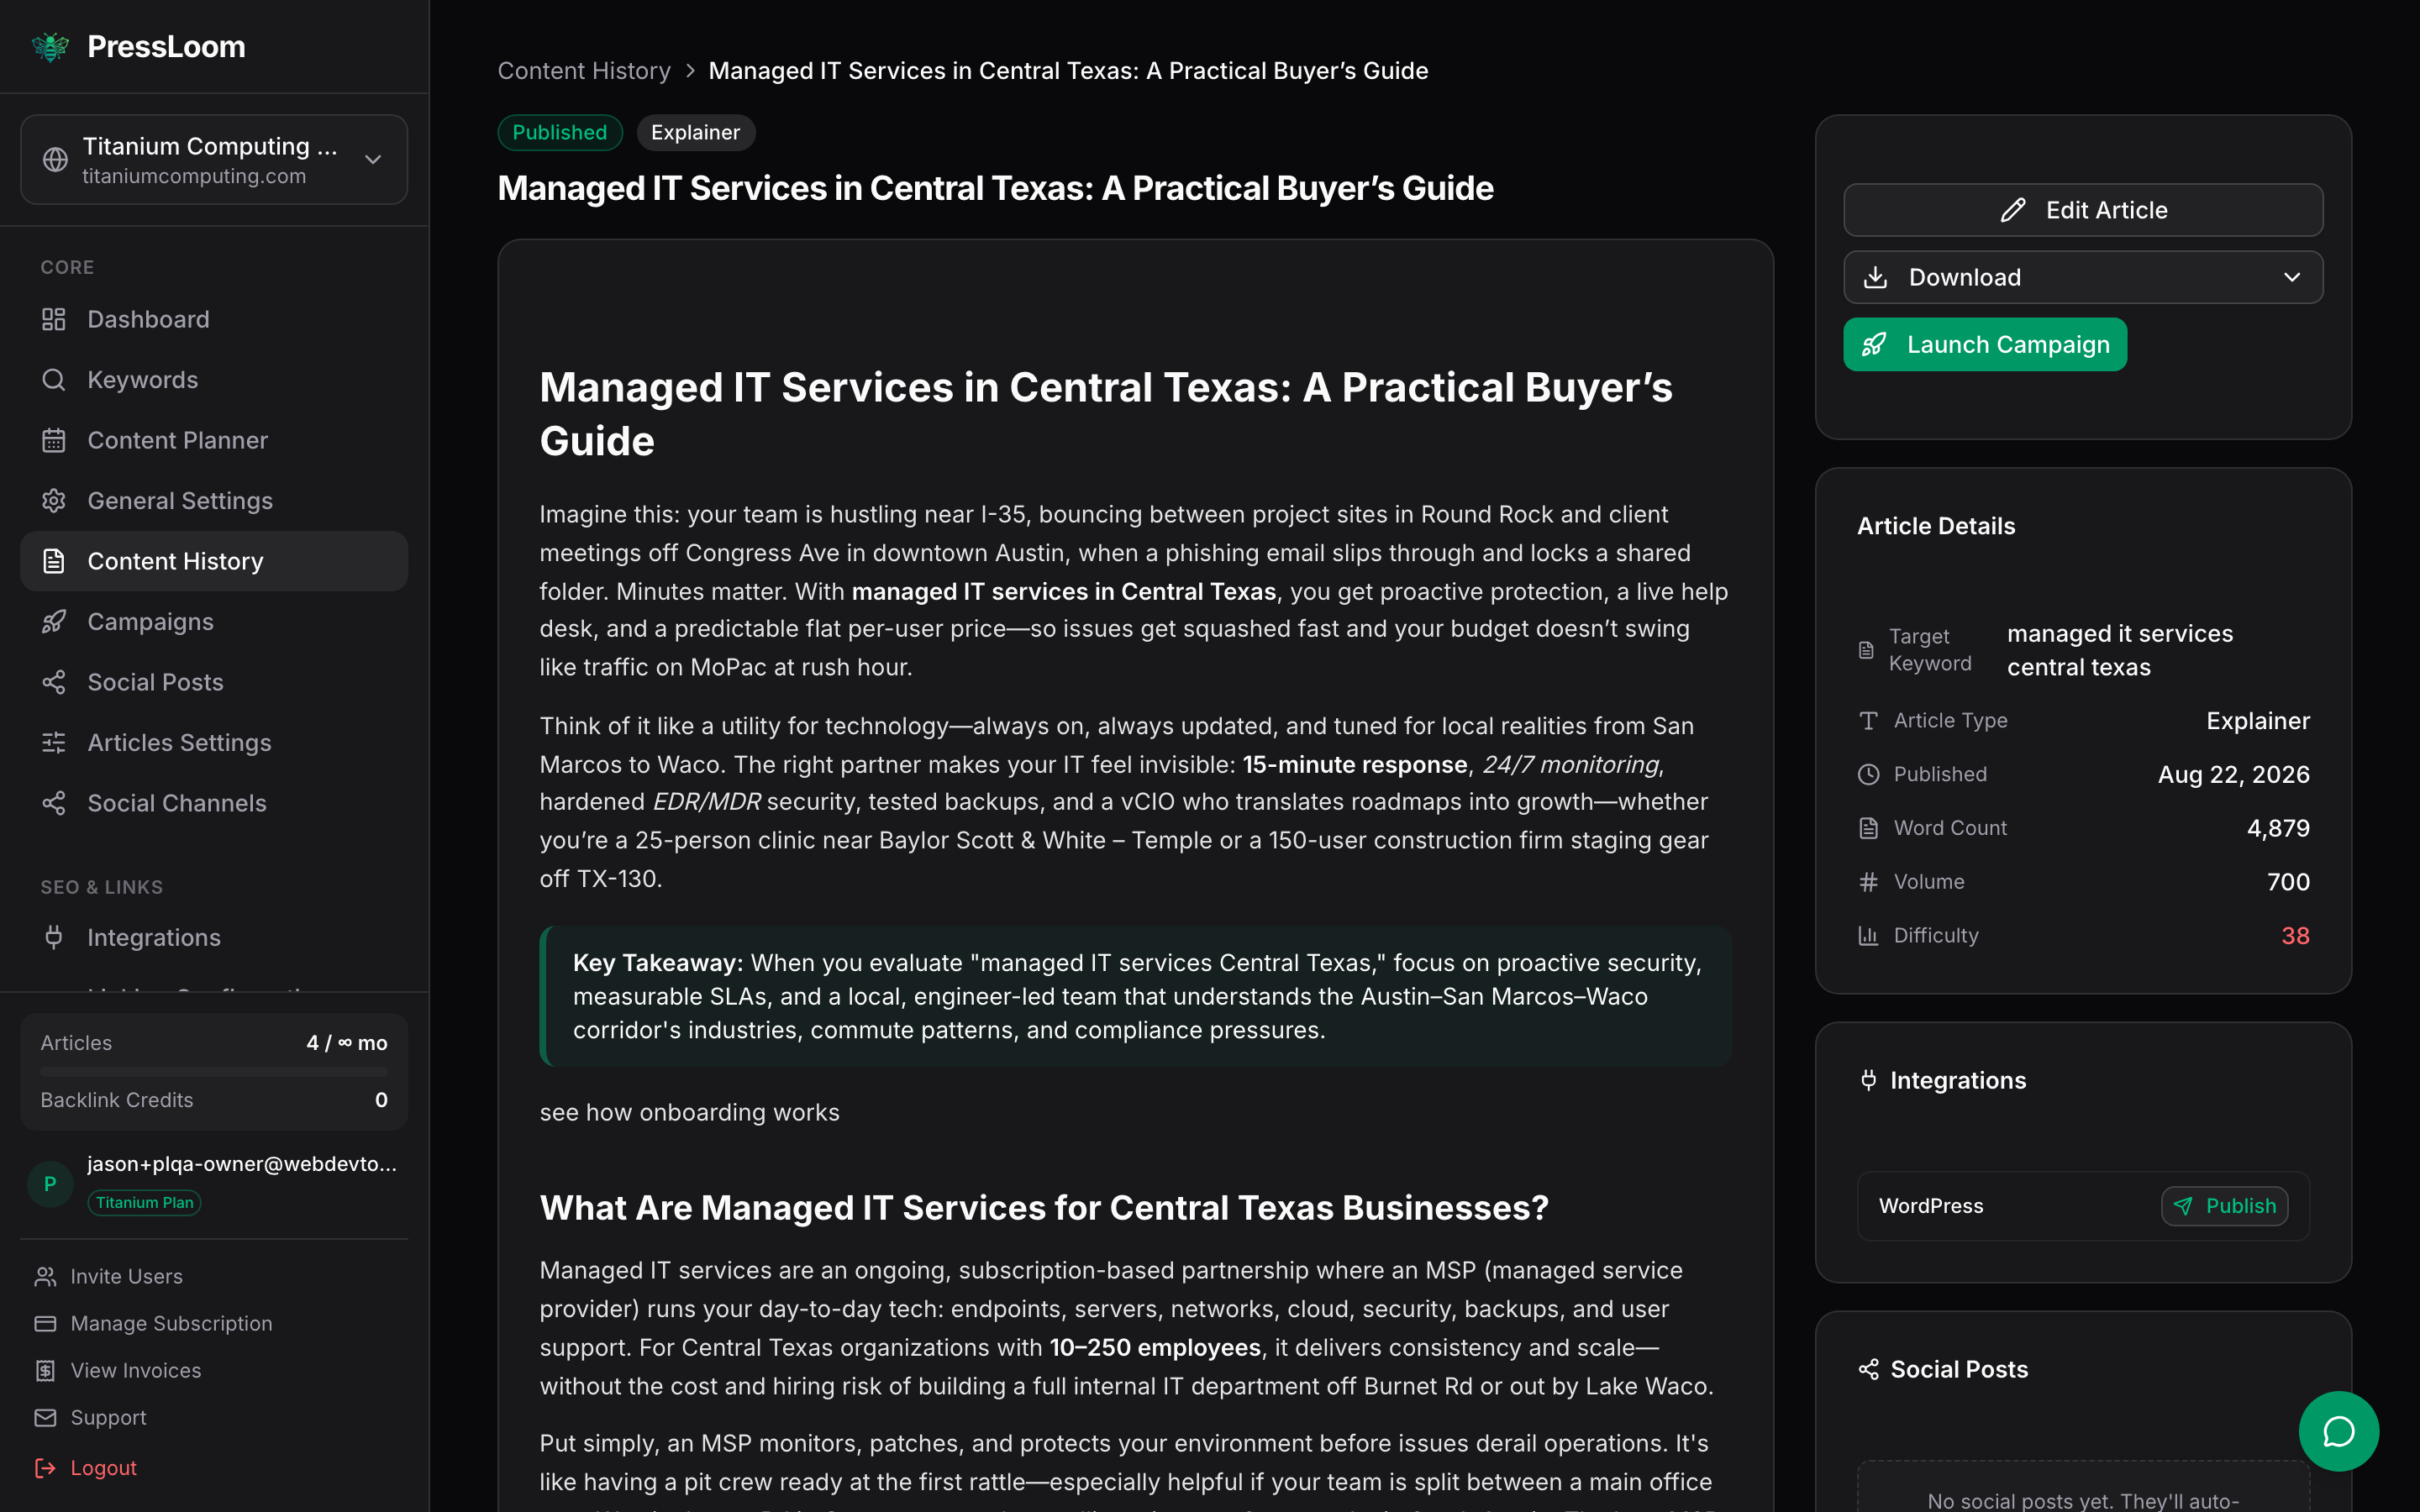
What the numbers mean
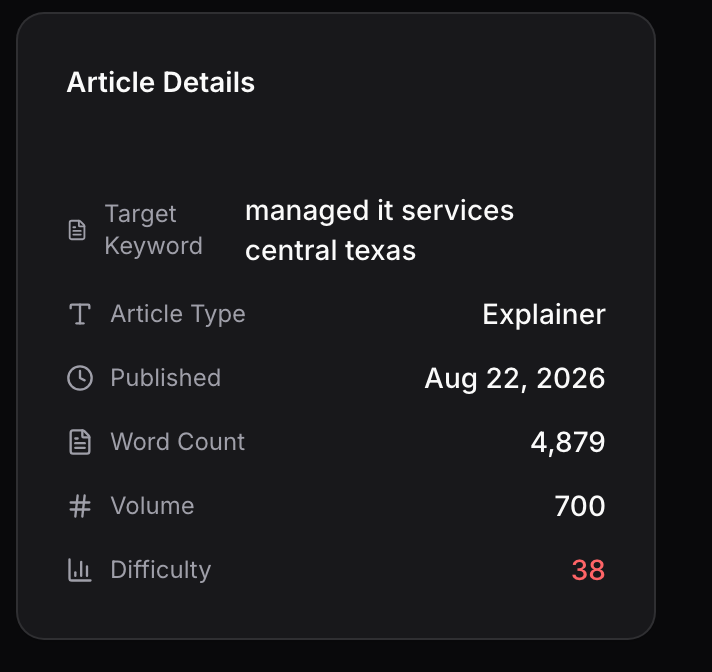
- Target Keyword is the phrase the article was written to rank for.
- Article Type is the shape PressLoom picked, such as Explainer, Comparison or How-to.
- Word Count is the length of the article as it stands. It updates when you save an edit.
- Volume is the estimated monthly searches for the keyword.
- Difficulty is how hard that keyword is to rank for, from 0 to 100. Lower is easier. It shows in green up to 10, amber up to 20, and red above that.
Editing an article
Click Edit Article in the top right card. The reading view is replaced by the raw article in a plain text box, with Save and Cancel above it.
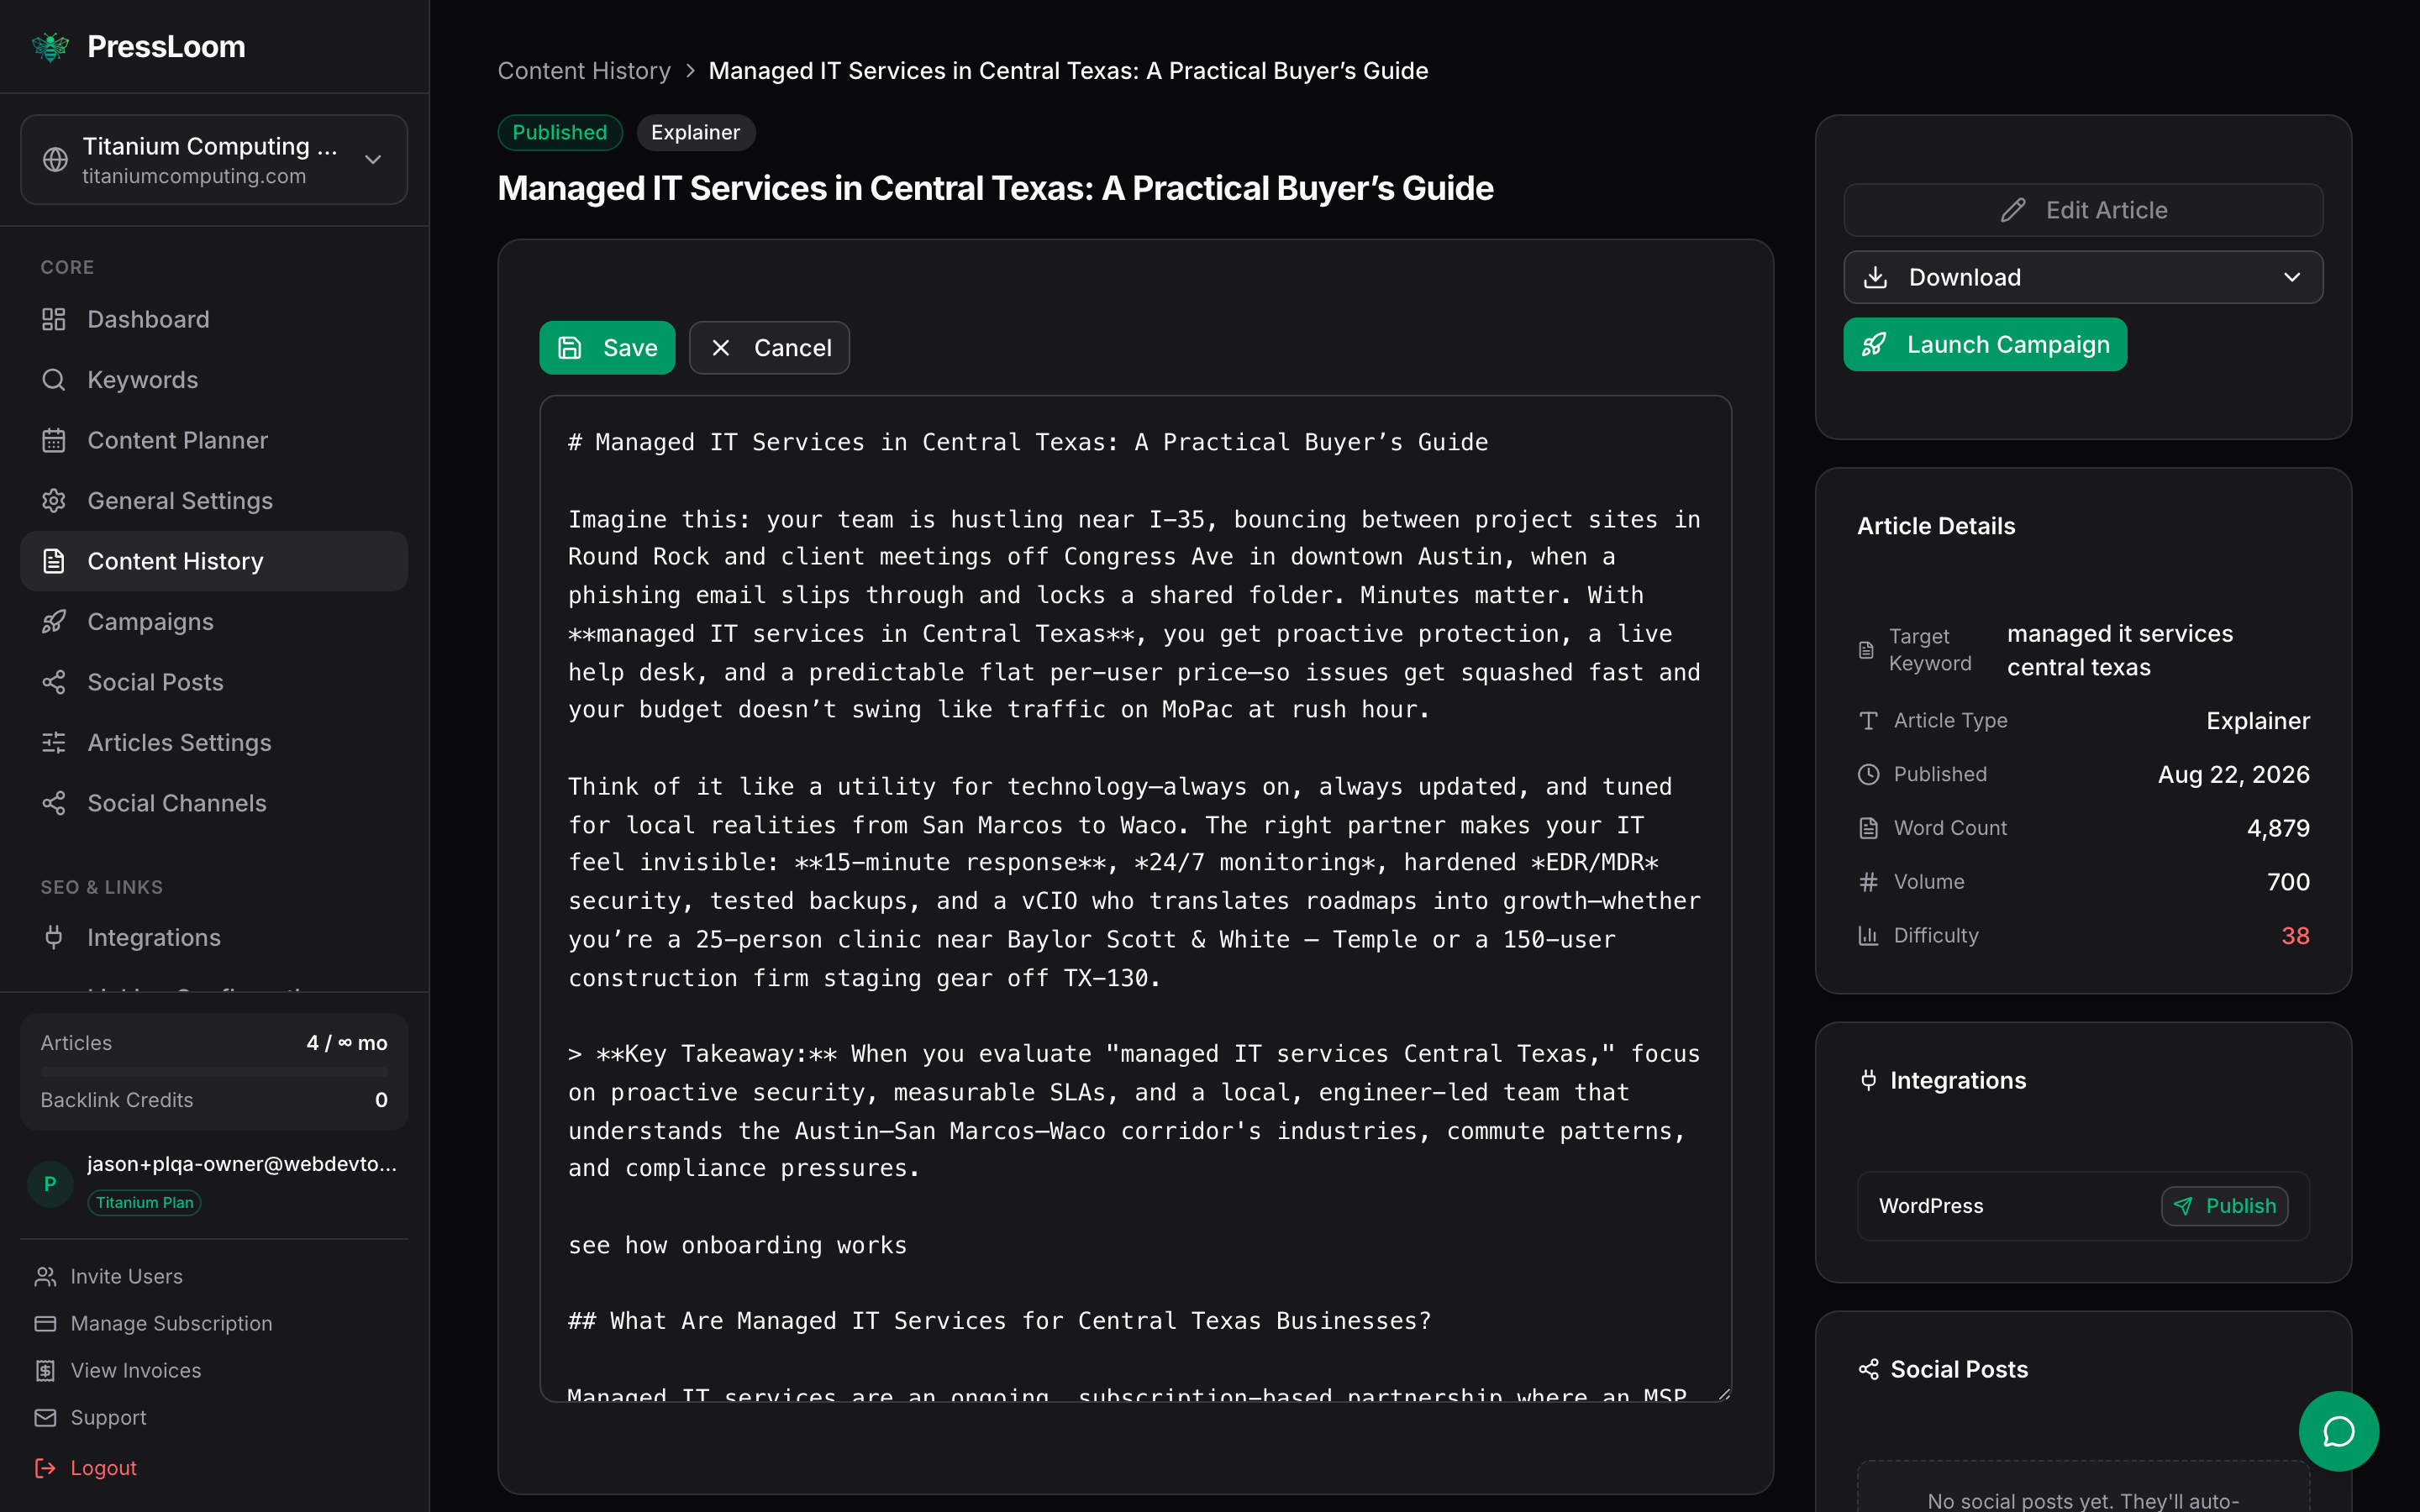
Markdown looks stranger than it is. The formatting is done with a handful of characters:
## A main heading
### A smaller heading under it

Normal paragraph text.

**Bold text** sits between two asterisks.

> **Key Takeaway:** A callout box starts with a > character.

- A bullet point starts with a dash.
Leave those characters alone and change the words around them, and the article will render correctly. Click Save when you are done. Cancel throws your changes away, so save before you navigate anywhere else.
Editing is the right moment to fix the things only you know: a service you do not actually offer, a price that is out of date, a town you do not cover. PressLoom writes from your business description, so it will occasionally guess.
Downloading the article
Click Download in the same card and you get two choices.
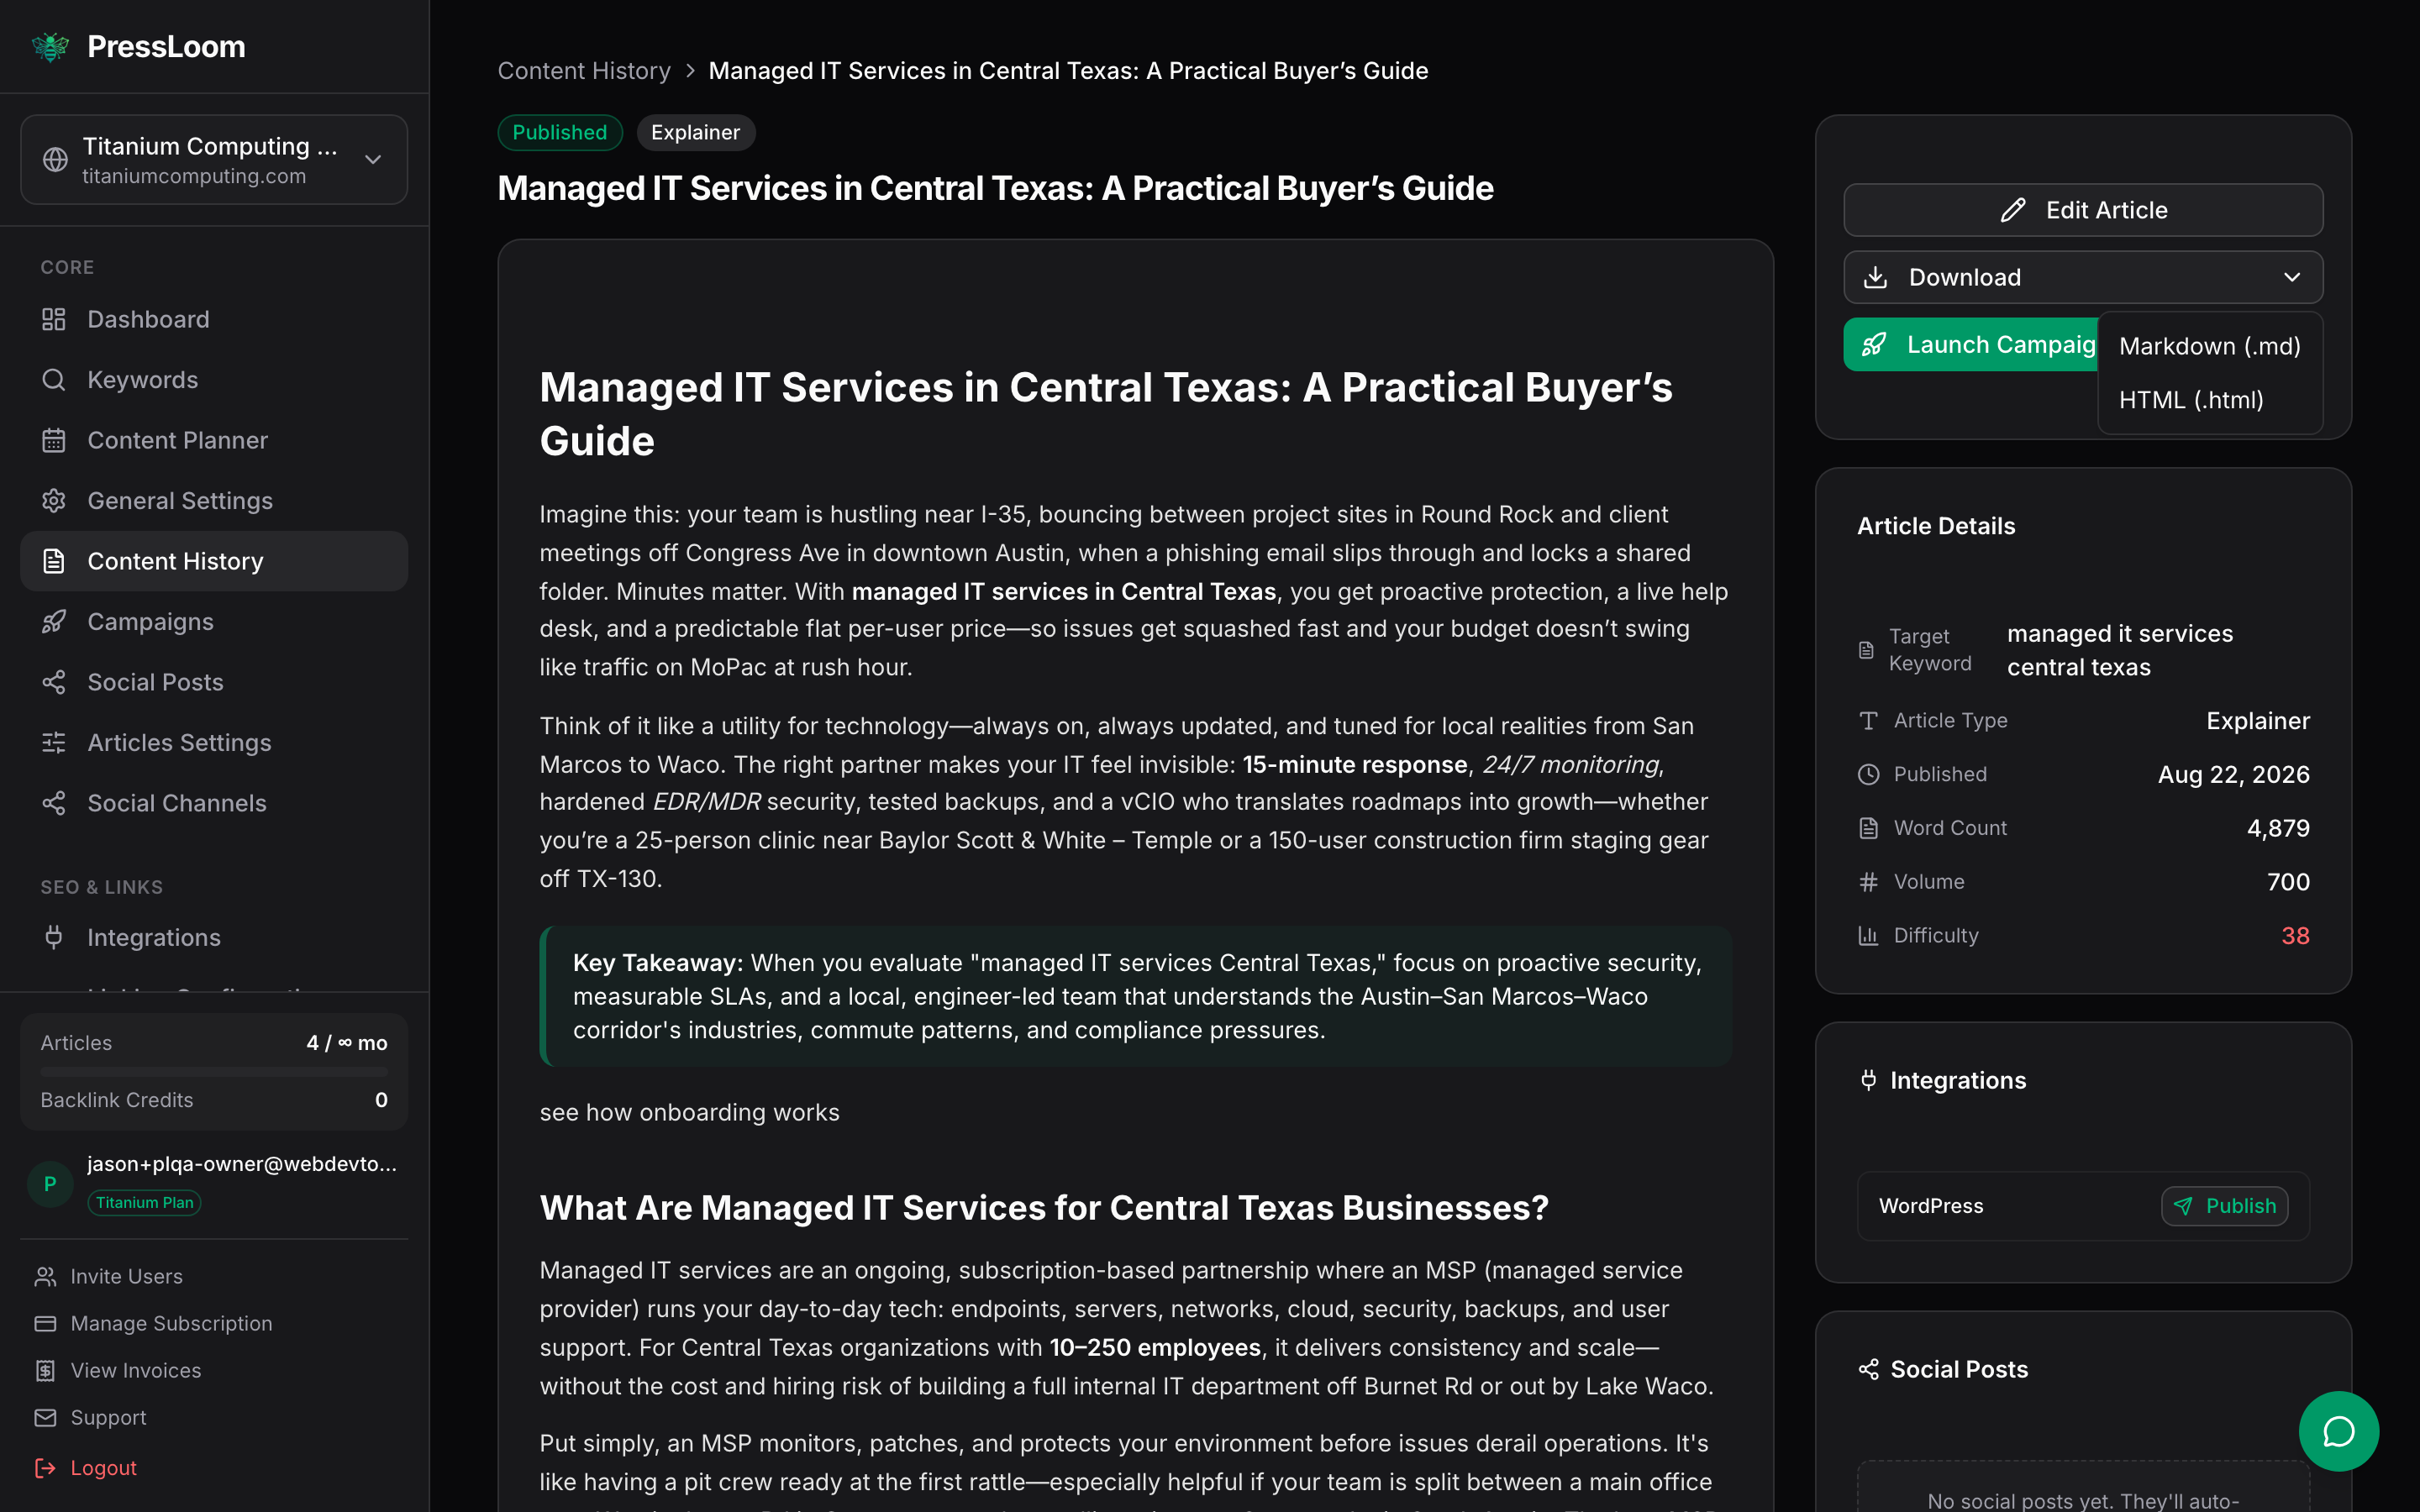
- Markdown (.md) is the plain-text version. Use it if you are handing the article to a writer, or pasting it somewhere that understands Markdown.
- HTML (.html) is the formatted version. Use it if you or your web person are pasting the article into a page builder or a CMS editor by hand.
The file is named after the article's URL slug. Downloading does not change the article's status and does not send it anywhere.
Publishing to your website
Publishing needs a connected site. If you have not set one up yet, see Connect your site first. Without one, the Publish button comes back with a message telling you to add an integration.
Scroll the right-hand column and you will find two ways to publish.
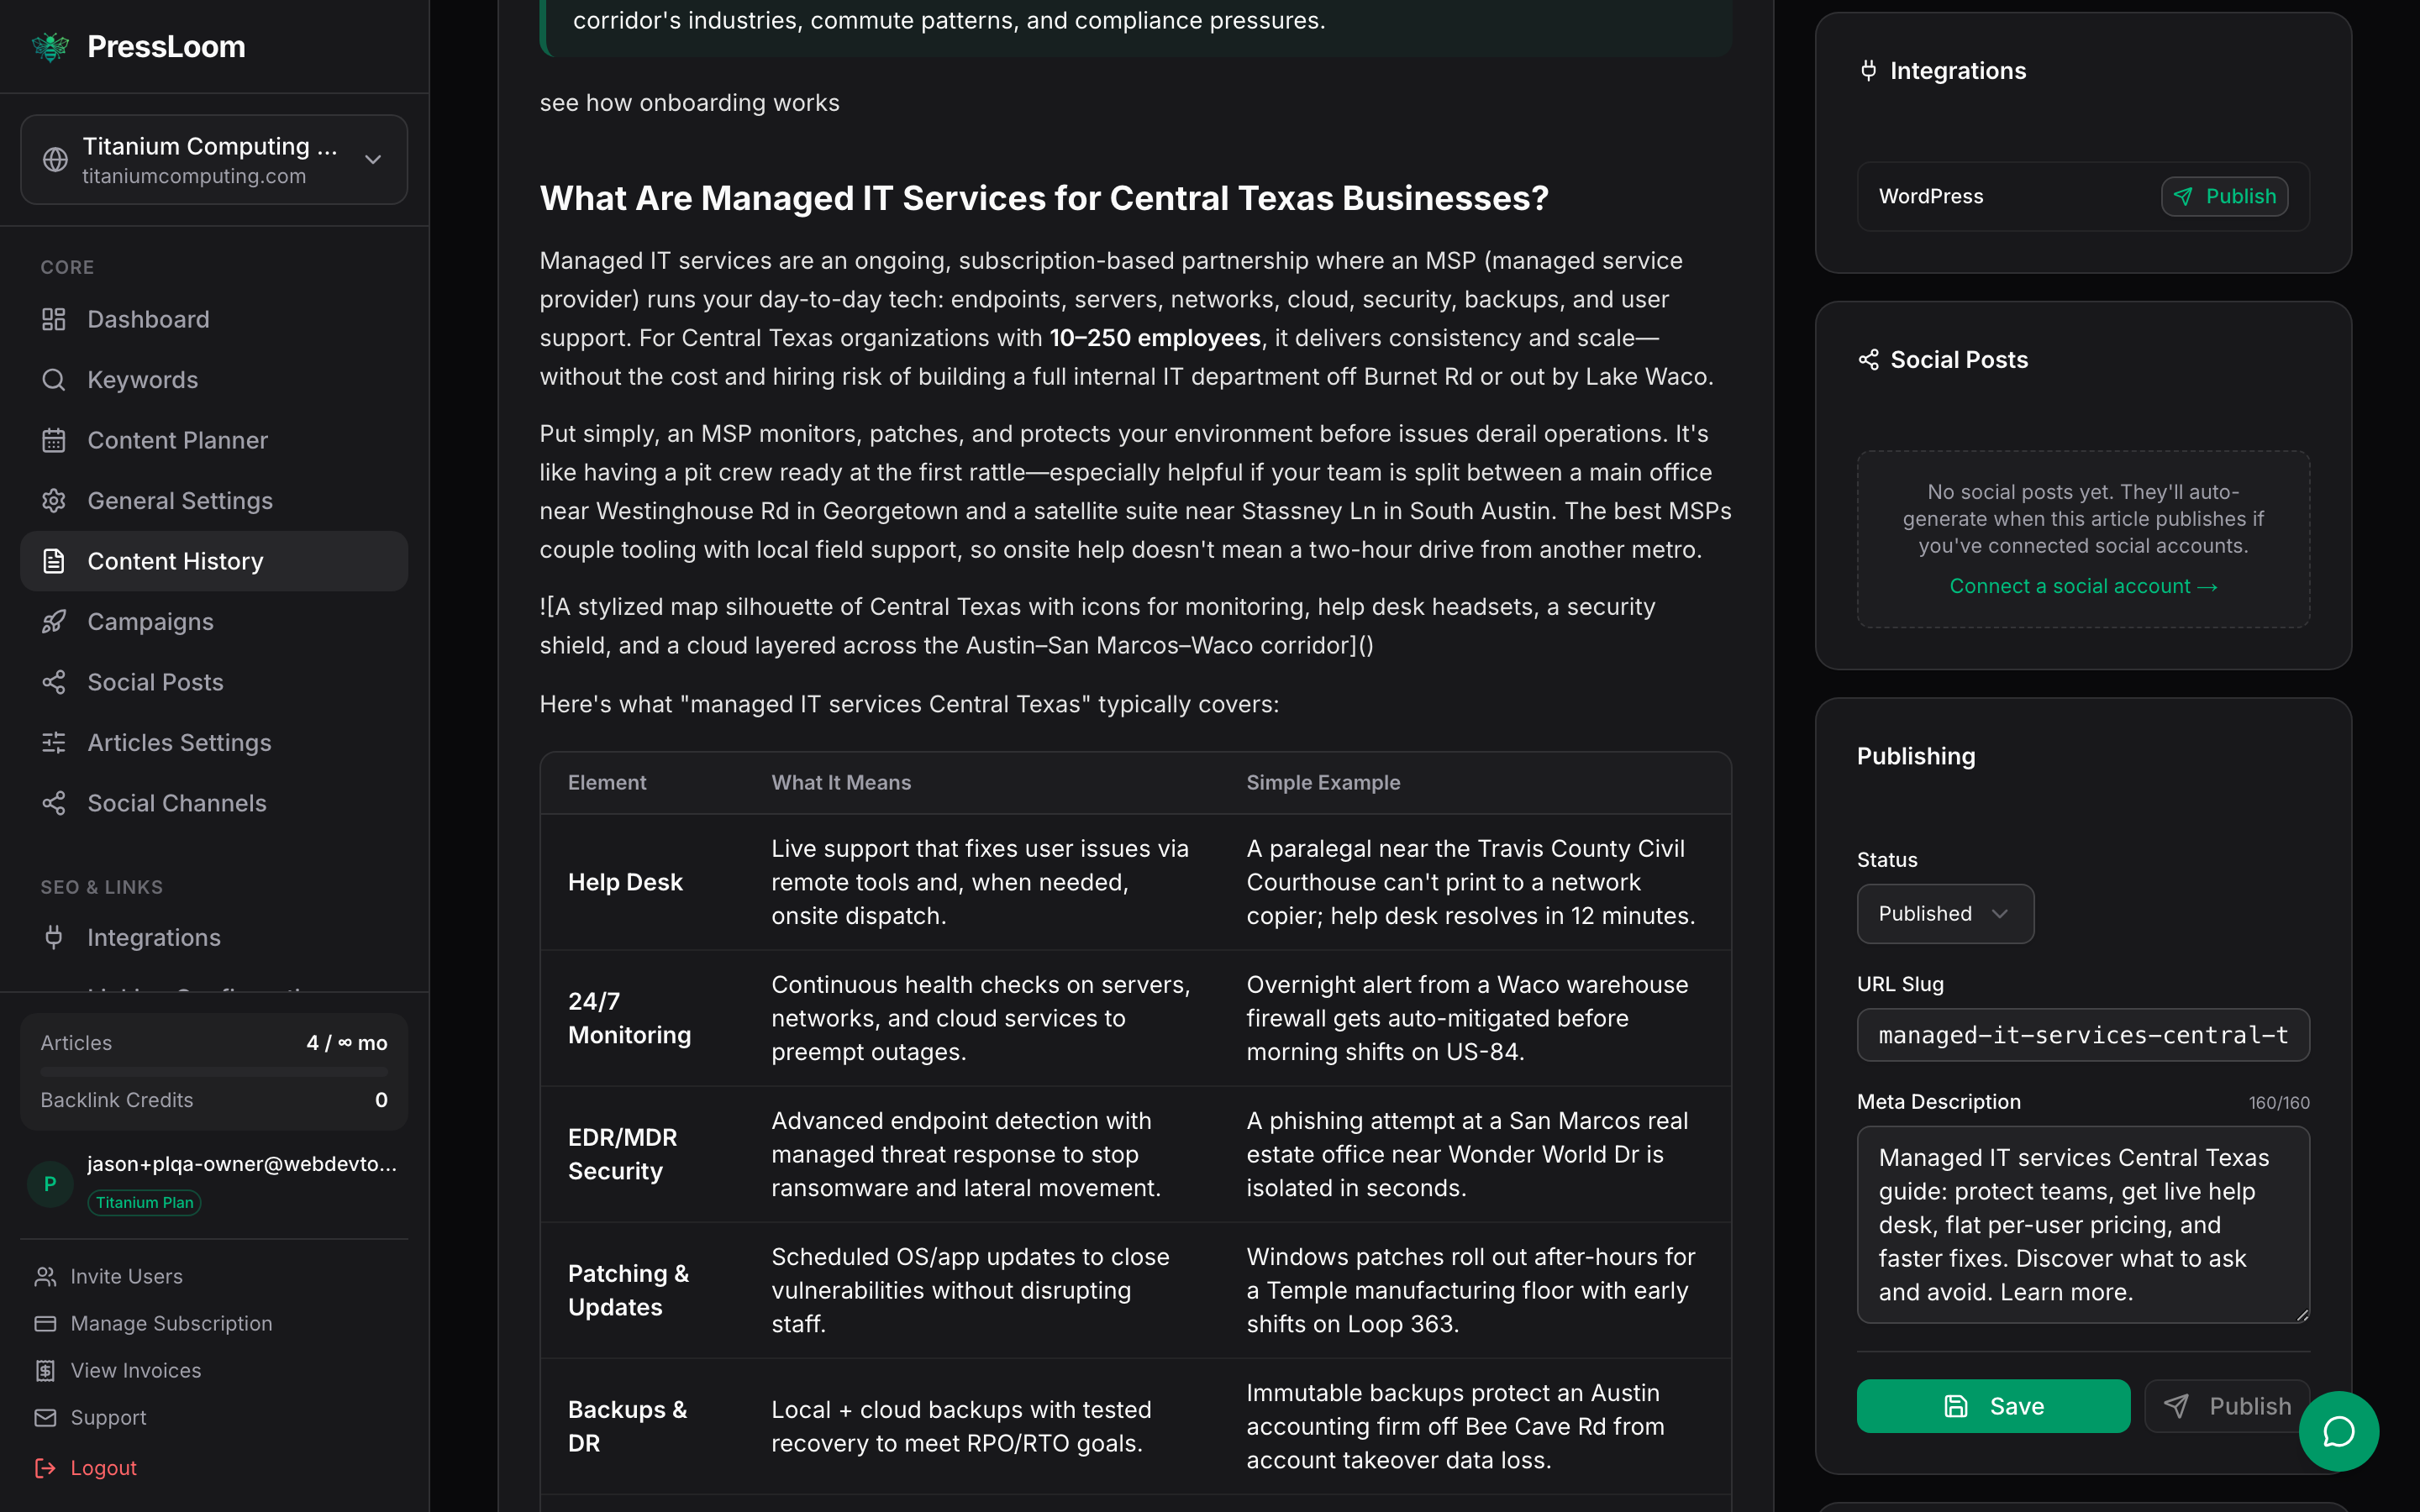
- The Integrations card lists every site you have connected, each with its own Publish button. Use this one. It sends the article to exactly the site you clicked, which matters if you have more than one connected.
- The Publish button in the Publishing card sends the article to your connected site as well, but it picks the site itself. It goes to WordPress if you have WordPress connected, otherwise to whichever site you connected first.
Both Publish buttons fire the moment you click them. Nothing asks you if you are sure. Read the article and check the slug before you click.
Fix the slug and description first
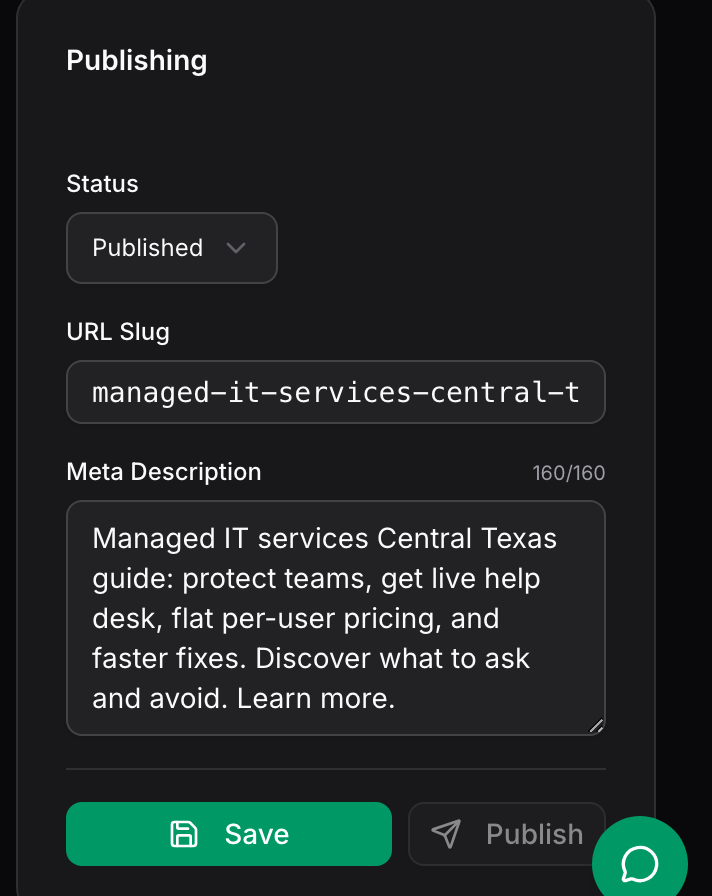
The Publishing card holds the three things worth checking before an article leaves PressLoom.
- Status sets whether the article counts as a draft or as published inside PressLoom. Set it to Draft to park an article you are not ready to send.
- URL Slug is the end of the article's web address. Lowercase letters, numbers and hyphens only, no spaces. Shorter is better. Two articles on the same site cannot share a slug.
- Meta Description is the grey text under your link in Google results. Keep it at or under the 160 shown in the counter, because Google cuts it off there.
Click Save in that card to keep those three changes. Save and Publish are separate buttons, so saving does not publish and publishing does not save whatever you just typed.
The Status dropdown also lists Archived. Archiving is not built yet, so leave that option alone and use Draft or Published.
What happens when you publish
PressLoom sends the article straight to your site, formatted for whatever you connected. WordPress gets proper WordPress blocks with your meta title and description attached. A git-backed site gets a commit in your repository. The article's status in PressLoom flips to Published and the date is stamped, and the keyword it came from is marked Published on your planner.
Whether the article arrives live or as a draft depends on where it is going.
- WordPress decides this itself, with the Post Mode setting in the connector plugin. Publish Directly means live, Save as Draft means a draft waiting for someone to press publish. That setting wins over anything PressLoom sends, so if you want a human eye on everything, set it there. See Connect your site.
- Everywhere else, the Auto-publish switch in Articles Settings decides. On sends the article as published, off sends it as a draft. See Settings.
On WordPress every publish creates a new post, so clicking Publish a second time gives you a duplicate with a slightly different address. If you do it by accident, delete the extra post in WordPress. A git-backed site behaves differently and rewrites the same file, so republishing there is safe.
Images
PressLoom plans images while it writes, and places them through the article. Turning those plans into actual pictures runs once image storage is configured for your account.
Until that is switched on, articles come through as text. In Content History you will see a generic file icon instead of a thumbnail, and the article has no featured image. The writing itself is unaffected, and your web person can drop images in on your site after publishing.
When generation fails
A failed article shows as Failed in Content History and the keyword card on the planner turns red with a Retry button. Nothing partial gets sent to your website. Click Retry on the card to run it again.
If the same keyword fails twice, the usual causes are a keyword too vague to research or a business description too thin to write from. Try rewording the keyword, or fill out your business description in Settings and run it again. If it keeps failing, email [email protected] with the keyword and we will look at it.